
Table of contents
- Change Air Filters Regularly for Improved Performance
- Clean Outdoor Unit: Prevent Debris Build-Up
- Inspect Ductwork for Leaks and Damage
- Adjust Thermostat Settings for Spring Comfort
- Test Air Conditioning System for Proper Functioning
- Have a Professional Verify Refrigerant Levels to Maintain Efficiency
- Clean Vents and Registers for Better Indoor Air Quality
- Check Insulation Around Pipes and Ductwork
- Schedule Professional HVAC Maintenance Service
- Consider Upgrades for Enhanced Efficiency and Comfort
- Additional Resources
Spring in Denton County, Texas, signals the arrival of warm weather. Around this time, many people turn to their air conditioning systems to stay comfortable. A properly functioning HVAC system is vital to your in-home comfort when the weather gets hotter. While you might be ready for spring, your HVAC system may not be. Don’t wait for hot weather to get your HVAC system ready. Along with professional service twice a year, maintenance practices you may be able to do on your own can help your system stay ready for when you need it. Here, Cote’s Mechanical will examine some maintenance tips to help get your HVAC system as ready for spring as you are.
Please note these tips are not meant to replace professional service.
If you don’t know how to do any of these services, please contact an HVAC professional.
Change Air Filters Regularly for Improved Performance
An HVAC system moves air throughout your home. To prevent it from moving dust and debris, air filters help “catch” them. Over time, however, the particles clog the filters, forcing your HVAC system to work harder when pulling air through them.
Dirty air filters can have several detrimental effects. Effects may include:
- Potential for higher energy bills
- Possible health issues
- Poorly functioning HVAC system
Several conditions affect how often you should change your air filter.
The two main types of HVAC filters are fiberglass air filters and pleated air filters.
- Fiberglass air filters: Fiberglass air filters must be changed every 30 days or less.
- Pleated air filters: Depending on conditions, pleated air filters can last up to 90 days.
Additional conditions that may affect how often you may need to change your HVAC filter include the following:
- The size of your house
- The number of people in the home
- Air quality in your area
- Allergies or other medical conditions
- Pets (if you have pets, the HVAC filter should be changed monthly)
- The current season
The season can affect how often you should change your HVAC filter, as your system tends to see more use the hotter or colder the weather gets. The heavier the use, the more frequently the filter will have to be changed.
Regardless of the filter or conditions, you should visually inspect it once a month and change it as needed.
Clean Outdoor Unit: Prevent Debris Build-Up
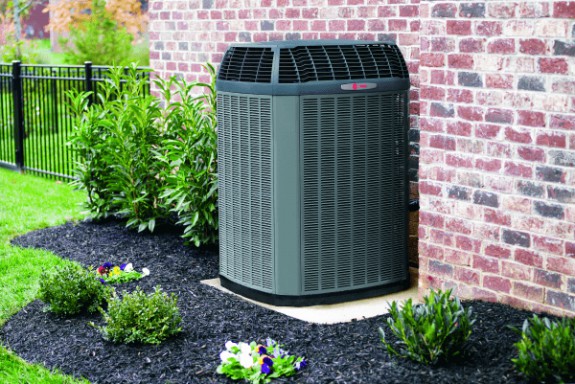
As with air filters, outdoor HVAC units must be clear of debris so air can pass through them. Over time, they can become obstructed, reducing the HVAC system’s performance. By cleaning the outside of your outdoor HVAC unit, you can help it perform better. Please note that cleaning the inside of your outdoor HVAC unit should be done by a professional.
Caution: Incorrectly handling your outdoor HVAC unit can lead to electric shock. If you don’t know how to safely clean the outside of your outdoor HVAC unit, please contact a professional.
Be sure to follow your manufacturer’s directions when cleaning your outdoor HVAC unit.
Step 1. Set the thermostat to “OFF.”
Step 2. Locate your outdoor HVAC unit’s electric disconnect, which is located in a metal box near it—generally on an exterior wall. Open the box and locate the switch or plug that controls power to the HVAC system. Turn the switch to the “OFF” position or pull out the plug.
Step 3. Wear gloves, and remove any large debris from on or around the unit.
Step 4. Clean the condenser fins using a vacuum cleaner with a soft brush attachment. Take care not to bend the condenser fins, as repairing them requires a special tool.
Step 5. Using a hose, gently spray the outside of the HVAC unit to remove debris like grass and leaves.
Step 6. Spray the outside of the unit again, this time with the coil cleaner. Then, wait 10 to 15 minutes for the coil cleaner to work.
Step 7. Take the hose and rinse off the coil cleaner.
Repeat this process at least once a year, ideally during spring. Regularly inspect the outside of the unit throughout the summer and repeat the cleaning as necessary.
Inspect Ductwork for Leaks and Damage
Ductwork is another crucial component of your HVAC system. It allows air to move throughout your home. While you may be able to do some ductwork inspections, it is best to involve an HVAC professional to get a better understanding of the condition of your ductwork.
You may be able to perform several ductwork inspections at home, such as:
Visual Inspection
In places you can safely access, check your ductwork for tears, gaps, disconnections, and duct tape repairs. Duct tape is not suitable for repairing ducts, and its use with ducts signifies a previous leak—one that might still exist.
Feel for Leaks
With your HVAC system turned on, return to the accessible parts of your air duct system. Place your hand over where the duct sections are connected. If you feel air on your hand, that indicates an air leak from a loose connection. Air leaks commonly occur in duct joints.
Smoke Pencil
When your HVAC system is on, guide a smoke pencil steadily alongside the HVAC ducts, and look for movement in the duct. This indicates air is escaping from it.
If you find any leaks, you can mark the spot using a grease pencil. From there, it’s a smart idea to enlist the help of an HVAC professional to make the necessary repairs.
Adjust Thermostat Settings for Spring Comfort
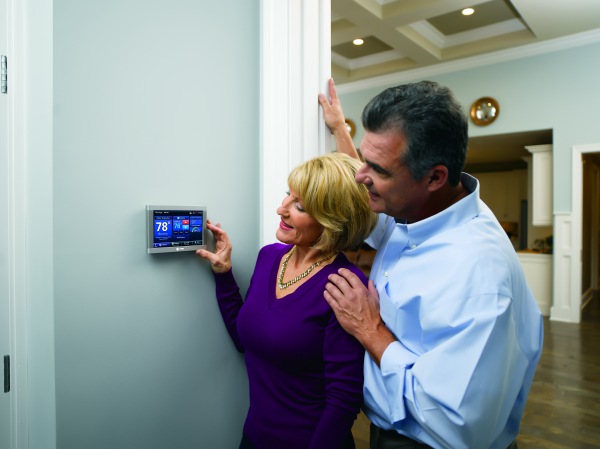
With the arrival of spring, you’ll most likely be ready to adjust your thermostat in response to the changing weather. While thermostat settings are a matter of personal preference or need, here are a few tips for setting your thermostat.
To save energy in hot weather, the Public Utility of Texas suggests, “Set your thermostat at 78°F or higher — every degree of extra cooling will increase energy usage six to eight percent.” They also note, “On warm days raise your thermostat to 80°F or higher if leaving for more than four hours.” Do NOT do this if people or pets are still in your home.
While this can help save energy, it may be too hot for some people. You’ll need to take into account the needs of your family and pets when determining the temperature to set your thermostat.
Test Air Conditioning System for Proper Functioning
You don’t want to be surprised with air conditioning trouble when temperatures rise. It’s essential to test it to ensure it is functioning correctly.
Steps you can take to test your air conditioning include:
When the AC is Running, Measure the Drop in Temperature
The following is a basic test you can conduct on your Air Conditioning System. Set your home’s thermostat to a level you are comfortable with that is lower than the ambient temperature.
Once you’ve done that, watch your thermostat to see if the temperature drops. A good baseline for air conditioning efficiency is a one-degree drop every 20 minutes.
Check if the Outside Condenser is Working
An outside condenser is an essential part of a central air conditioning system. It is the unit positioned next to your house.
To test if your outside condenser is working correctly, position your hand about a foot above it while it is running. You should feel air coming out. If there isn’t any, the condenser isn’t working. If the air from the condenser is cold, it isn’t removing heat from your home. When functioning correctly, the air from your condenser should be warm to hot. Generally, the hotter the air comes out, the more heat is extracted from your home.
Listen for New or Odd Noises
It is normal for an aging HVAC system to make more noise. However, unusual noises, particularly those heard when the HVAC system is starting, are a cause for concern. Listen to the condenser for noises. If you hear odd or new noises, contact an HVAC professional as soon as possible.
Check Your Registers and Vents for Proper Air Flow
Vents and registers (the grills located on ceilings and walls) enable airflow into and out of air ducts. For your HVAC system to do its job, the vents and registers need to work properly.
Particles and discoloration on vents and registers are signs of dirty and unhealthy air. If you notice this on your vents or registers, you’ll need to contact an HVAC specialist as soon as possible to determine the contamination’s source and how to remedy it.
Pay Attention to Odors Coming from the HVAC System
Odors coming from an HVAC system can indicate trouble, particularly those that come from the evaporator coil. The moisture and lack of light and air make the evaporator coil susceptible to bacterial growth. This can create a bad odor and potentially a health hazard.
To address this, you should contact an HVAC professional for a deep cleaning. Bacterial growth is not something you should take lightly, as it can cause health issues.
Have a Professional Verify Refrigerant Levels to Maintain Efficiency
Refrigerant enables your air conditioning to cool your home. Low refrigerant levels reduce an air conditioner’s ability to cool a house and can even damage an HVAC system.
Given the difficulty of checking the refrigerant level and the safety risks associated with handling air conditioner refrigerant, it should be handled by reputable professionals.
Clean Vents and Registers for Better Indoor Air Quality
Air in your home passes through vents and registers. These can accumulate dust and even potentially hazardous mold. You should wipe them down once a month and clean them more thoroughly once or twice a year.
When cleaning ceiling vents, whether you remove them or leave them in place as you clean, you should cover the area under them with a sheet and wear a baseball cap to help keep dust out of your hair and eyes. For particularly dirty ceiling vents, you might want to cover nearby furniture as well.
Cleaning Vent Covers Without Removing Them
Step 1. Shut off the A/C or Heat before you start cleaning.
Step 2. Vacuum vents with a microfiber extendable duster or a dusting brush attachment. If you don’t have those, you can wipe the vent using a slightly wet Mr. Clean Magic Eraser or a dry microfiber cloth.
Do NOT use other cleaning products or water, as they can create a bigger mess by smearing dust onto ceilings or walls.
Cleaning The Insides of Vents
The inside of your vents should be cleaned twice a year. Please note that a full duct cleaning will require an HVAC professional.
Step 1. Remove the vent cover by unscrewing it. It will most likely be covered in dust.
Step 2. Place the vent covers in a hot and soapy water-filled sink. You can wash larger vents outdoors or in a bathtub. Use a small amount of dish detergent. Make sure you don’t soak the vent covers too long in the sink or rub too hard when cleaning them, as the paint could come off.
In the event your vent cover has oily residue on it, lightly rub rubbing alcohol on it. Be sure to do it lightly so you don’t remove the paint.
Step 3. Lightly wiping vent covers with a microfiber cloth removes water spots.
Step 4. Ensure the vent covers are fully dry before you reinstall them. If they are still wet, dust will cling to the vent slats.
Check Insulation Around Pipes and Ductwork
Insulation around pipes and ducts has several benefits. It’s a smart idea to inspect your insulation to check its condition. While you most likely won’t be able to inspect your entire pipe and duct installation, you should be able to check some of it. Look for tears, mold, and loose or missing insulation. If you need insulation repaired or replaced, have it done by a professional. Improperly installed insulation can damage air quality.
Professional insulation inspection is still important, as they have specialized tools for a more detailed inspection.
Warning: In the past, homes used highly dangerous asbestos insulation. If you don’t know if your home has asbestos, please contact a professional for an inspection.
Check your Attic’s Pipe and Ductwork Insulation
You should always use appropriate safety equipment when checking your ceiling’s insulation, including gloves, face protection such as a dust mask, and a hard hat to protect against roofing nails. If you can safely access your attic, check around your ductwork and pipes. There should not be any blocked vents or insulation openings. Check for loose, torn, and moldy insulation, as well as insulation sections that have become separated on pipes and ducts.
Caution: Don’t step on insulation or exposed ceiling drywall, as you could fall through the ceiling. Carefully use sturdy boards instead.
Have an HVAC Professional Inspect the Pipe and Ductwork Insulation Inside your Walls
Given the risks and difficulty of inspecting the pipe and ductwork insulation inside your walls, have it done annually by a reputable HVAC professional. They have the tools needed to fully understand the insulation in your walls. If the power in the wall isn’t turned off correctly, there is a risk of electrical shock.
Check your Basement’s Pipe and Ductwork Insulation
Inspect your basement’s pipe and ductwork insulation. As with your attic, look for air leaks by air ducts, air ducts and pipe insulation that is loose or torn, moldy insulation, and pipe and duct insulation sections that have separated.
Schedule Professional HVAC Maintenance Service
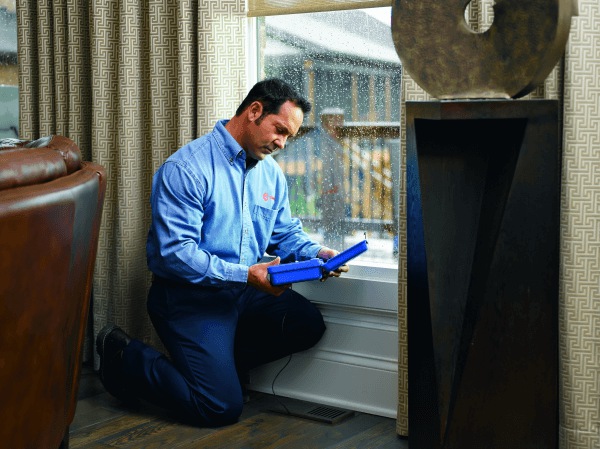
Regular professional HVAC maintenance is essential for keeping your system functioning correctly. It’s an excellent idea to have it inspected before it sees heavy use in the springtime. You don’t want to deal with a faulty or non-functioning air conditioner when the temperatures rise.
Some potential benefits of routine professional HVAC maintenance include:
Greater Efficiency
A properly functioning HVAC system offers savings on energy and is better for the environment.
Better Indoor Air Quality
A lack of HVAC maintenance can result in poor air quality, which can cause discomfort and even health problems. Regular HVAC maintenance benefits your air quality.
More Consistent Temperature
When an HVAC system works correctly, it reaches and stays at the preferred temperature more consistently.
Less Likely to Break Down
HVAC breakdowns are not only inconvenient but can also be dangerous. You don’t want to deal with a malfunctioning or broken-down HVAC system in the summer heat. A well-maintained HVAC system is less likely to break down, saving you discomfort and money on repairs.
Safety
HVAC systems can potentially leak carbon monoxide, an odorless and colorless gas that can be deadly. Regular maintenance can help reduce the likelihood of carbon monoxide leaks.
Potentially Longer Life of HVAC System
Replacing an HVAC system is a costly endeavor. Regular maintenance can help prolong the life of your HVAC system.
Consider Upgrades for Enhanced Efficiency and Comfort

If you feel your air conditioning isn’t keeping your home cool enough or are looking to reduce your energy bills, you may be able to improve it. Methods range from simple to complex. Before upgrading your HVAC system, it is important to speak with an HVAC specialist to decide the best course of action.
Ways to upgrade your HVAC system for increased efficiency and comfort can include:
Smart Thermostat
Smart thermostats offer increased convenience and efficiency for your HVAC system. Smart thermostats are controllable via smart devices, so you won’t have to head over to the thermostat when you want things a little cooler. Along with the enhanced convenience, smart thermostats can help you save money on your energy bills.
Insulation Upgrade
A properly insulated home offers several benefits. It helps make your home more energy efficient by reducing energy loss.
“Insulation
- saves money and our nation’s limited energy resources
- makes your house more comfortable by helping to maintain a uniform temperature throughout the house, and
- makes walls, ceilings, and floors warmer in the winter and cooler in the summer.”
Adding HVAC Zoning
Adding HVAC Zoning to your home gives you greater control over the temperature of individual rooms in your house—great for when family members have different preferences. It also allows you to save money and energy by using less air conditioning or heat in rooms that don’t require as much.
The Installation of an Energy Recovery Ventilator (ERV)
An energy recovery ventilator (ERV) helps improve a home’s air quality. Modern homes and buildings are designed to be “tight” for energy efficiency. When cracks and gaps are sealed, it prevents the exchange of air, saving energy and making homes more comfortable. However, if a home is “tight” and does not have proper ventilation, airborne contaminants can get stuck in the home, resulting in health risks for the occupants.
High air quality depends on a way for contaminants and moisture to exit the home and for fresh air to enter. Energy Recovery Ventilators allow fresh air to enter and are designed for humid and hot climates such as the Dallas Fort Worth area.
